Introduction
Welcome to the ultimate guide on how to fix a crack in a plastic bathtub, a common issue for homeowners with this affordable and easy-to-install option. While plastic tubs are designed to withstand significant weight and usage, they are not immune to damage.
Whether it’s from a heavy object’s impact or a structural fault, a crack in your bathtub can be a source of frustration. However, before you consider a costly bathroom remodel, know that there are effective repair solutions that can restore your tub’s functionality and appearance.
In this guide, we’ll walk you through the steps to assess and mend cracks of various sizes, ensuring your bathtub remains a reliable and luxurious part of your home for years to come.
If you’re dealing with a crack in your plastic bathtub, it’s essential to understand that not all cracks are created equal. The size, location, and type of plastic of your tub can all influence the repair method you’ll need to employ.
From simple adhesive fixes for minor damage to more comprehensive repair kits for larger issues, we’ll provide you with the knowledge to tackle the problem head-on.
And for those looking to enhance their bathroom’s longevity, we’ll also discuss preventative measures to keep your bathtub in top condition. Should you decide that a repair isn’t sufficient, we’re here to connect you with an authorized bathtub installer for a professional and lasting solution.
Assess the crack in the bathtub

Size and location of the crack
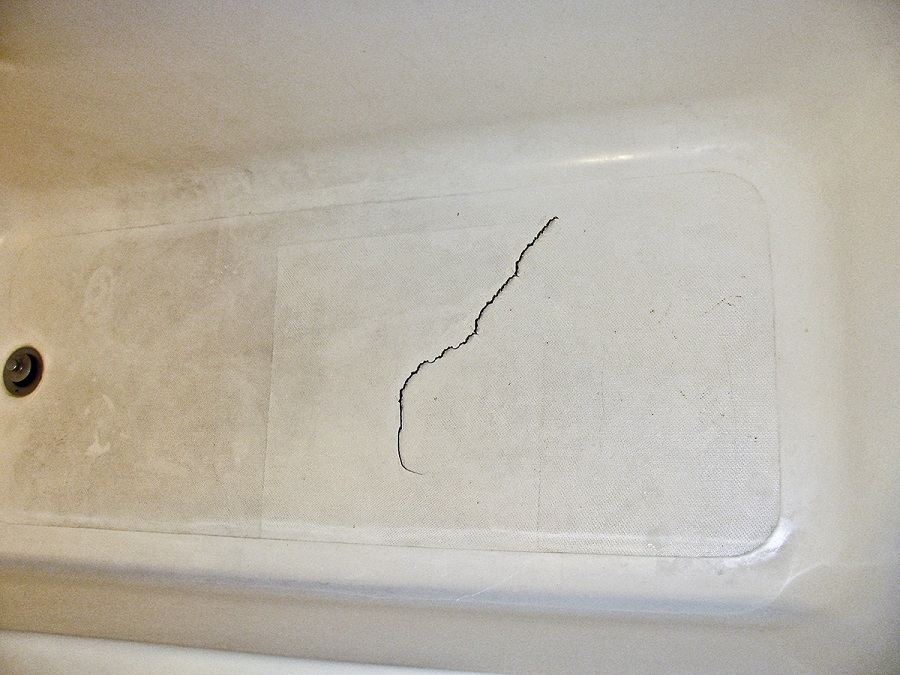
Assessing the size and location of the crack is a critical first step in the repair process. Smaller cracks, often found near the drain or along the sides of the bathtub, can typically be fixed with a simple adhesive or epoxy.
However, larger cracks, especially those on the bottom of the tub where weight is regularly applied, may require a more robust approach to ensure a durable repair.
The location of the crack not only affects the choice of repair method but also the urgency of the fix, as cracks on the bottom can lead to leaks and potential water damage to your bathroom structure.
It’s also important to determine the type of plastic your bathtub is made from, as this will dictate the materials and techniques used for the repair. Most non-metal tubs are made from acrylic or fiberglass, materials that respond well to certain adhesives and repair kits designed specifically for these surfaces.
Identifying the correct type of plastic is essential for a successful repair, as using the wrong materials can lead to further damage or an ineffective fix. With the right approach, even a long, thin crack can be seamlessly patched, restoring the integrity and appearance of your bathtub.
Determine the type of plastic
Before you embark on the repair journey, it’s crucial to ascertain the specific material of your bathtub. While the term ‘plastic bathtub’ is commonly used, the actual material is likely to be either acrylic or fiberglass—both of which have distinct repair requirements.
Acrylic bathtubs are known for their durability and glossy finish, whereas fiberglass tubs are a bit more pliable and have a matte appearance. To determine the type of plastic, you can perform a simple tap test: acrylic gives a solid sound, while fiberglass sounds more hollow.
This knowledge is vital as it influences the choice of repair materials, ensuring that the fix adheres properly and stands the test of time.
Once you’ve identified the material, you can select the appropriate repair method. For acrylic tubs, a specialized acrylic repair kit is your best bet, while fiberglass tubs may require a fiberglass repair kit that includes resin and hardener.
It’s important to follow the manufacturer’s instructions closely, as each type of plastic has its own sensitivities and reacts differently to various adhesives and solvents.
By pinpointing the exact type of plastic, you can proceed with confidence, knowing that your repair will be both effective and enduring, keeping your bathtub looking and functioning like new.
Repairing a small crack in a plastic bathtub

Clean the area around the crack
Cleaning the area around the crack is an indispensable step before applying any repair material. Start by thoroughly washing the bathtub as usual, focusing intently on the cracked zone to eliminate all traces of soap scum, grime, and debris.
This meticulous cleaning ensures that the repair materials will bond correctly to the surface. After scrubbing, rinse the area well and allow it to dry completely; a minimum of 24 hours is recommended to ensure no moisture remains.
A clean, dry surface is critical for the adhesive or epoxy to effectively seal the crack, preventing water infiltration and further damage.
For cracks wider than 1/4 inch, it’s advisable to reinforce the area with fiberglass mesh before applying the adhesive.
Measure and cut the mesh so that it extends at least half an inch beyond each side of the crack, ensuring full coverage.
The mesh acts as a scaffold for the repair material, providing additional stability and strength to the final repair.
Once the mesh is in place and the area is clean and dry, you’re ready to proceed with the application of the repair product, moving one step closer to a fully restored bathtub.
Apply epoxy or plastic adhesive
Applying epoxy or plastic adhesive is the next critical step in mending your bathtub. For a robust and lasting repair, opt for a two-part epoxy specifically designed for plastic surfaces, which will cater to the flexibility required to withstand future stress.
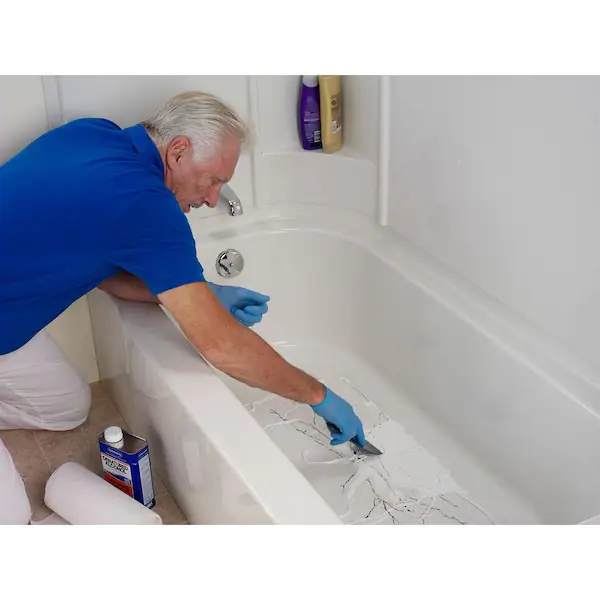
Carefully mix the epoxy according to the instructions, aiming for a thin consistency that can penetrate deeply into the crack. Use a putty knife or similar tool to press the epoxy firmly into the crevice, ensuring it fills the entire gap.
For an emergency fix, this method can provide a temporary solution, but remember that a bathtub’s tendency to flex may eventually cause the rigid epoxy to crack again. Allow the epoxy to cure for a full 24 hours to achieve maximum strength and adhesion.
If you’re dealing with a larger crack, a bathtub repair kit may offer a more comprehensive solution, complete with waterproof tape that stretches to accommodate movement and prevent peeling.
This tape, when applied correctly, can seal the crack and provide a water-resistant barrier. Although the aesthetics of the repair may not perfectly match the original bathtub surface, the functionality will be restored, allowing you to use your bathtub confidently until a more permanent solution can be implemented.
Always ensure that the repair area is immaculately clean and dry before applying any adhesive material, as this will significantly enhance the durability of the repair.
Sand and smooth the repaired area
Once the repair material has been applied and has had sufficient time to harden—typically a few hours as per the manufacturer’s directions—it’s time to sand and smooth the repaired area. This step is crucial for blending the repair seamlessly with the rest of the bathtub’s surface.
Start with a fine-grit sandpaper to gently sand the patch, being careful not to scratch the surrounding areas. The goal is to achieve a smooth, level surface that feels consistent with the rest of the tub.
After sanding, wipe away any dust with a damp sponge, let it dry, and if necessary, apply a layer of paint to match the tub’s color.
This attention to detail will not only enhance the appearance of your bathtub but also ensure the longevity of the repair.
Fixing a large crack in a plastic bathtub
:max_bytes(150000):strip_icc()/SPR-Home-best-tub-repair-kits-4158688-5f0f2377a9764effbcbed17ad02e85cf.jpg)
Use a bathtub repair kit
For those confronting a more substantial crack, utilizing a bathtub repair kit can be an effective and user-friendly option.
These kits are designed to address larger damages and often include all the necessary components, such as fiberglass mesh, resin, and sometimes color-matched paint to ensure a discreet repair.
The inclusion of fiberglass mesh in these kits provides an additional layer of strength, bridging the gap and reinforcing the area around the crack.
It’s important to follow the kit’s instructions meticulously, as proper application is key to achieving a watertight seal and a smooth finish that blends with the existing bathtub surface.
After applying the mesh and resin as directed, patience is required to allow the repair to cure fully, which may take several hours or overnight.
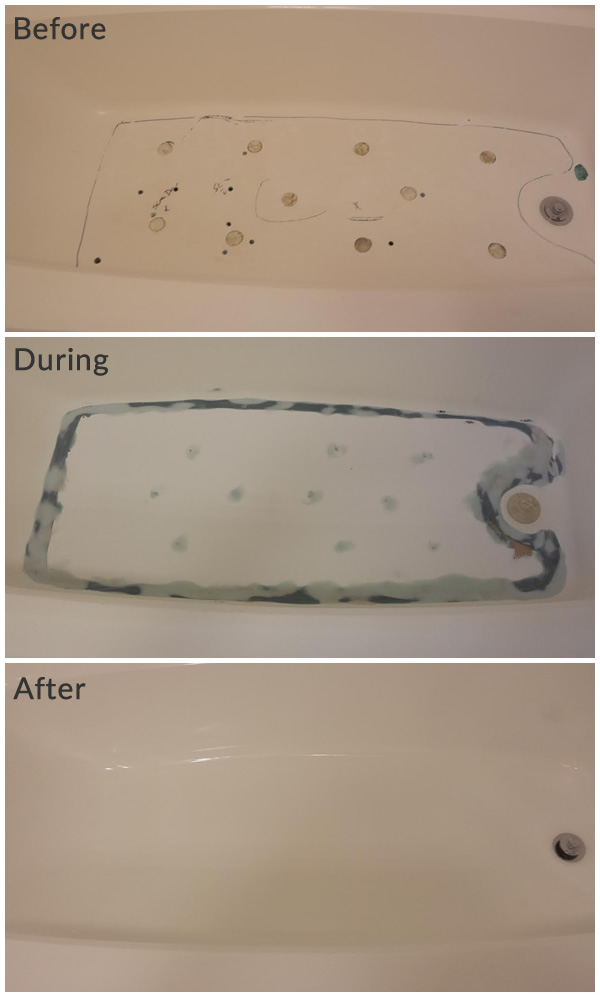
Once cured, the process of sanding and refinishing begins, similar to the steps taken for smaller repairs. This will help to integrate the repaired section with the rest of the bathtub, minimizing the visibility of the crack.
Although the repaired area may not be an exact color match to the rest of your bathtub due to natural discoloration over time, the structural integrity will be restored, extending the life of your bathtub and saving you from the cost and hassle of a full replacement.
Apply fiberglass mesh and resin
After applying the mesh and resin as directed, patience is required to allow the repair to cure fully, which may take several hours or overnight. Once cured, the process of sanding and refinishing begins, similar to the steps taken for smaller repairs.
This will help to integrate the repaired section with the rest of the bathtub, minimizing the visibility of the crack.
Although the repaired area may not be an exact color match to the rest of your bathtub due to natural discoloration over time, the structural integrity will be restored, extending the life of your bathtub and saving you from the cost and hassle of a full replacement.
Sand and refinish the repaired area
Once the resin has hardened, it’s time to sand the surface of the patch to ensure it is flush with the rest of the tub.
Employing fine-grit sandpaper is crucial to avoid scratching the surrounding area. This step is not just about aesthetics; it’s about creating a seamless surface that feels smooth to the touch.
After sanding, meticulously clean away any residual dust with a damp sponge, let it dry, and if necessary, apply a layer of paint to match the tub’s color.
This final touch-up can make a significant difference, helping the repair to blend in and restoring the bathtub’s original look as closely as possible.
Refinishing the repaired area is the last step in the restoration process. If the repair kit includes color-matched paint, apply it carefully to the sanded surface, following the manufacturer’s guidelines for the best results.
This not only conceals the repair but also provides an additional protective layer against water and wear. With the right approach and materials, even a large crack in a plastic bathtub can be repaired effectively, ensuring that the tub remains functional and visually appealing for years to come.
Prevent future cracks in the bathtub

Use a non-abrasive cleaner
To maintain the integrity of your newly repaired bathtub and prevent future cracks, it is essential to use a non-abrasive cleaner for routine maintenance. Harsh chemicals and abrasive cleaning tools can cause fine scratches and gradual wear on the surface of the bathtub, which over time can lead to new cracks or exacerbate existing ones.
Opt for gentle, non-abrasive bathroom cleaners that are designed for acrylic and fiberglass surfaces. These cleaners effectively remove soap scum and grime without compromising the bathtub’s finish, ensuring that your tub continues to look its best while reducing the risk of damage.
Regular cleaning with the appropriate products not only preserves the appearance of your bathtub but also contributes to its longevity. By avoiding abrasive materials and harsh chemicals, you protect the repair work and the original bathtub material. This simple yet crucial practice helps in extending the life of the bathtub and keeping it in pristine condition. Remember, the key to a lasting repair is not just in the fix itself, but also in how you care for the bathtub afterward.
Avoid dropping heavy objects
Another vital precaution to prevent future damage is to avoid dropping heavy objects into the bathtub. The impact from items such as large shampoo bottles, heavy-duty cleaning tools, or even children’s toys can create stress points that may eventually lead to cracks.
It’s important to handle items with care when using them around the bathtub and to educate family members, especially children, about the importance of being gentle. By minimizing the risk of impact, you can help ensure the longevity of your bathtub’s surface and structure.
Moreover, it’s wise to equip your bathtub with non-slip mats or appliques, which not only prevent accidents but also reduce the chances of heavy objects hitting the tub directly if they do fall. These simple additions act as a buffer, absorbing some of the force and protecting the integrity of the plastic.
Consistent mindfulness about what goes into your tub, combined with these protective measures, can go a long way in maintaining a crack-free and safe bathroom environment.
Regularly inspect and maintain the bathtub
Regular inspections are a crucial aspect of bathtub maintenance that should not be overlooked. Periodically checking your bathtub for signs of wear or damage can help you catch small issues before they escalate into larger, more costly problems. Look for any discoloration, warping, or minor cracks that may have formed since your last repair.
Early detection allows for timely interventions, ensuring that your bathtub remains a safe and functional feature in your home. It’s recommended to incorporate these inspections into your regular cleaning routine for maximum efficiency and peace of mind.
Additionally, maintaining the structural support of your bathtub is paramount. Ensure that the base of the tub is properly supported and that there is no excessive movement when it is in use. Over time, even slight shifts can contribute to the formation of cracks.
If you notice any instability, it may be time to reinforce the bathtub’s support or consult with a professional. By staying vigilant and proactive in the care of your bathtub, you can enjoy a durable and reliable fixture that stands the test of time.
Conclusion
In conclusion, while temporary fixes for cracks in plastic bathtubs can extend the life of your fixture, it’s important to recognize that these repairs may not be permanent solutions. Addressing the issue promptly and with the right techniques can prevent further damage, but if the structural integrity of the tub is compromised, replacement might be the most reliable option.
Remember, regular maintenance and mindful usage are key to preserving the condition of your bathtub, but when the time comes for an upgrade, choosing a high-quality replacement is an investment in your home’s comfort and safety.
Ultimately, whether you opt to repair or replace, understanding the nature of plastic bathtubs and the best practices for their care will help you make informed decisions. By taking a proactive approach to maintenance and being cautious with your bathtub’s use, you can minimize the likelihood of future cracks.
Sources:
- https://www.mobilehomerepair.com/bathtub-repair-kit-quick-fix-crack-tub/
- https://www.bathwraps.com/articles/fixing-a-cracked-bathtub/
- https://diy.stackexchange.com/questions/476/what-is-the-best-way-to-repair-a-cracked-bathtub
- https://www.weekand.com/home-garden/article/repair-plastic-bathtub-cracked-18013168.php
FAQ
-
Can you repair a crack in an acrylic bath?
Surface repair kits make use of polymer-based tape or paint to seal the cracks on the outer surface of your bathtub.
-
Can plastic baths be repaired?
What types of surfaces can the bath repair kit be used on? The Bath Repair Kit can be used on acrylic, plastic, stone resin, ceramic, Acrylic Capped and enamel surfaces. Making it ideal for repairing all sanitary ware furniture.
-
What will fix a crack in a bathtub?
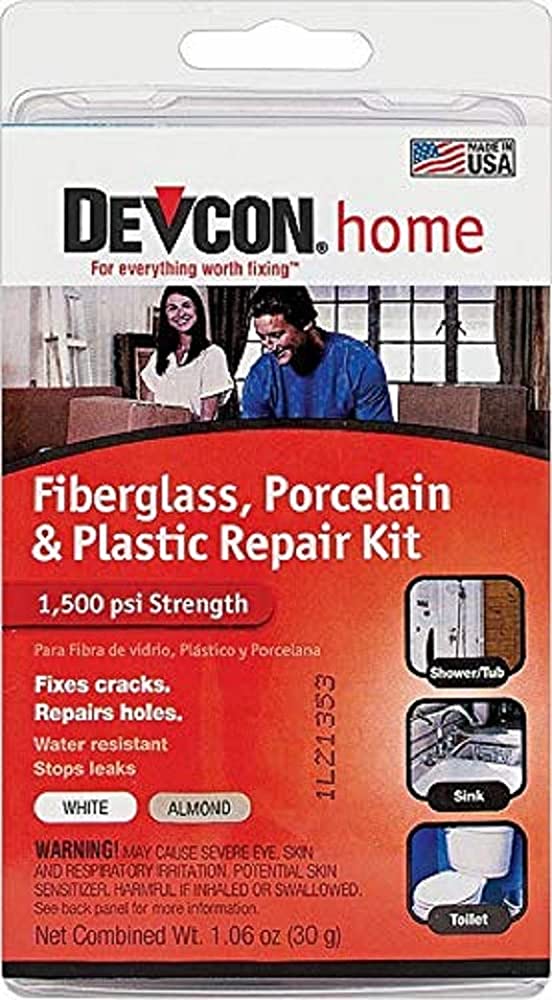
Devcon’s Fiberglass, Porcelain and Plastic Repair Kit repairs small holes and cracks in bath and tub fixtures. The epoxy repair kit mixes to a white color, but the almond/bisque pigment can be added for color matching. Use to repair bathtubs, shower stalls, surrounds and sinks.
Originally posted 2023-07-21 02:26:18.


